Warning: Undefined array key "file" in /home/kateefra/public_html/wp-includes/media.php on line 1734


Creating a themed and cohesive Instagram feed can seem like a daunting task, arising more questions than answers. To ease the headache of editing, I have created a fall themed preset to give your photos a put together, warm-toned look. In this week’s post, I’ll walk you through how to create the same preset I use on my Instagram and blog for the golden, fall themed look we all know and love.
To start off, download the free ‘Adobe Lightroom Photo Editor’ app from the App Store or Google Play. Then upload a picture of your choice to the app to create the preset on. The preset can also be created using the purchasable computer version of Adobe Lightroom.
After the photo is uploaded, click on the ‘Light’ button at the bottom of the screen, and change your settings to match the images below.
Light:


After changing the photo’s light settings, click on the ‘Color’ button at the bottom of the screen. Color is where we’ll be doing most of our work. Like the previous button, change your settings to match that of the image below.
Color:

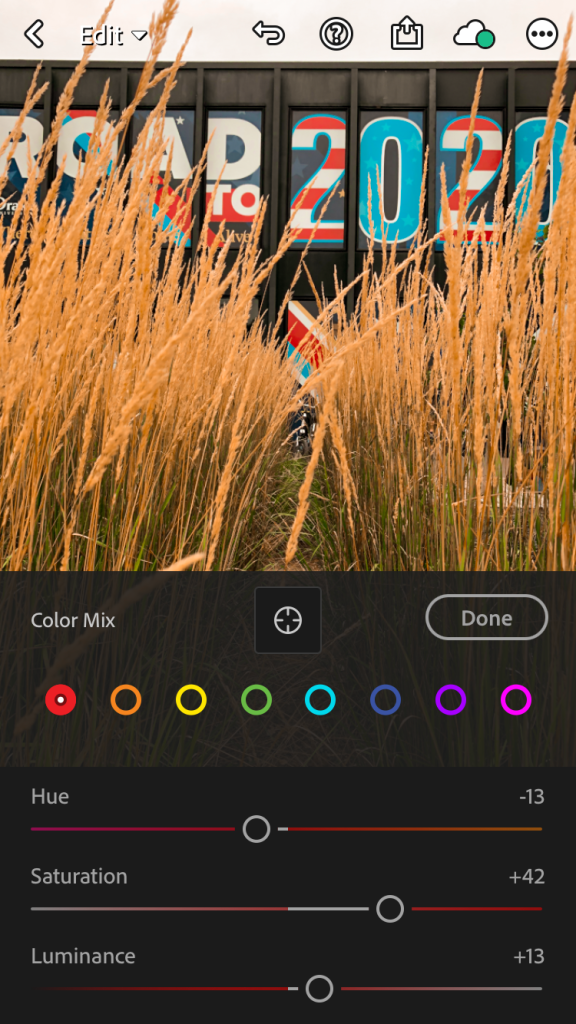
For the next step, we will be changing the appearance of each individual color within the image by clicking the color wheel next to the word ‘Mix’ at the top right of the color page.
Once you are on the ‘Color Mix’ page, click on the red circle and adjust your photo’s red tones to match the image below. Follow the same instructions for each color.
Color Mix:
Red & Orange:

Yellow & Green:


Light Blue & Dark Blue:


Purple & Pink:


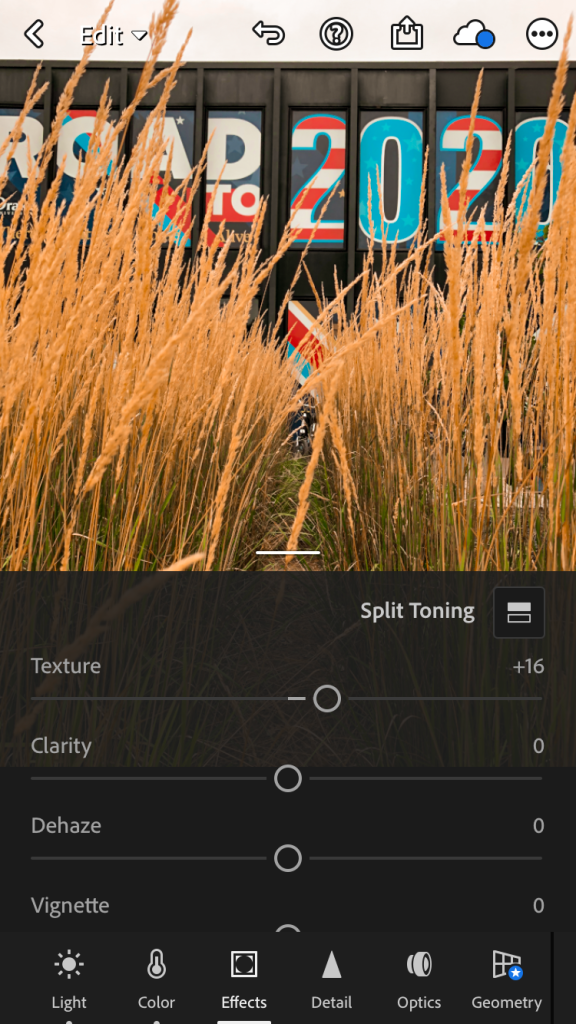
After adjusting your image’s colors, click the ‘Effects’ button at the bottom of the screen. The only change in this section will be to the image’s texture.
Effects:
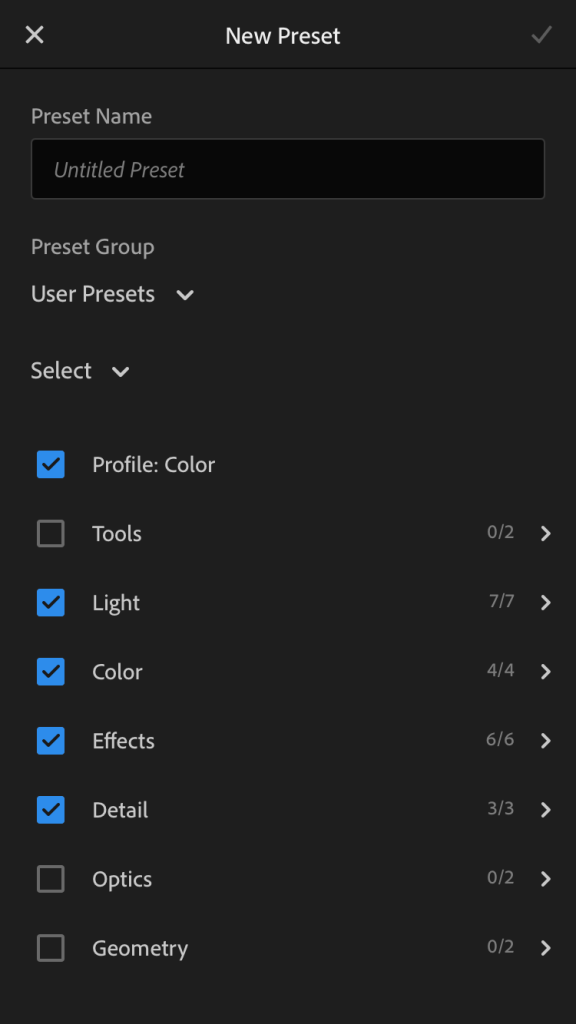
Lastly, once all changes have been made to the photo, scroll over to the ‘Presets’ button at the bottom of the screen. Hit the 3 dots at the top right corner, and click ‘Create Preset.’ After creating your preset, name it ‘Autumn,’ and hit the check mark at the top of the screen to save it.
Presets:

After clicking the checkmark, the preset should be saved, meaning you can try it out on all your favorite photos. For best results, I recommend using the preset on naturally cool-toned or overexposed photos.
If you have any questions on how to create the preset, please leave them in the comments below, and I’ll answer them as soon as possible. Be sure to check back next week to see my latest blog post!
Originally published on That’s Fall She Wrote on September 25th, 2020.